
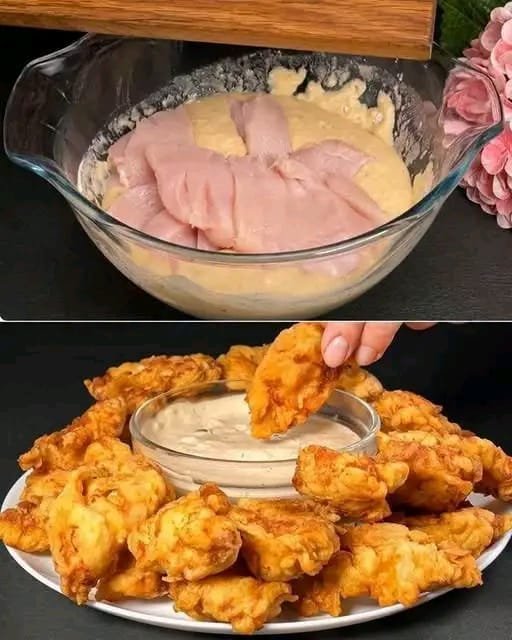
How to Make Crispy KFC-Style Chicken at Home and Save Money Every Weekend 🍗✨
Who doesn’t love biting into a piece of golden, crunchy fried chicken with a juicy, tender center? If you enjoy restaurant-style fried chicken but want to save money on takeout, this homemade KFC-style chicken recipe is the perfect solution.
With simple pantry ingredients, a flavorful buttermilk marinade, and a seasoned flour coating, you can make deliciously crispy fried chicken right in your own kitchen. The secret is in the preparation: marinating the chicken, creating a craggy coating, and maintaining the correct frying temperature.
This recipe is inspired by the familiar flavor and texture of fast-food fried chicken. It is not the official KFC recipe, but it delivers a satisfying homemade alternative for family dinners, weekend gatherings, and game-day meals.
Why You’ll Love This Homemade Fried Chicken
- Extra-crispy coating: A seasoned flour mixture creates a crunchy exterior.
- Juicy chicken: A buttermilk marinade helps tenderize the meat and adds flavor.
- Budget-friendly: Cooking at home can cost less than ordering restaurant meals, depending on ingredient prices and portion sizes.
- Customizable seasoning: Make it mild, peppery, or spicy.
- Perfect for sharing: Serve it with fries, coleslaw, biscuits, or your favorite dipping sauce.
Preparation and Cooking Time
- Preparation time: 25 minutes
- Marinating time: 4 hours minimum, preferably overnight
- Cooking time: 25–40 minutes per batch, depending on the chicken pieces
- Servings: 4–6
Ingredients
For the Chicken
- 2–3 lb (900 g–1.4 kg) chicken pieces, such as drumsticks, thighs, and wings
- 2 cups (480 ml) buttermilk
- 1 large egg, optional
- 1 teaspoon salt
- ½ teaspoon black pepper
- 1 teaspoon garlic powder
For the Crispy Coating
- 2 cups (250 g) all-purpose flour
- ½ cup (60 g) cornstarch
- 2 teaspoons paprika
- 1 teaspoon garlic powder
- 1 teaspoon onion powder
- 1 teaspoon dried oregano
- 1 teaspoon dried thyme
- 1 teaspoon black pepper
- ½ teaspoon white pepper, optional
- ½–1 teaspoon cayenne pepper, optional
- 1 teaspoon salt, or to taste
- ½ teaspoon baking powder, optional, for a lighter coating
For Frying
- Neutral oil with a high smoke point, such as canola or sunflower oil
Step-by-Step Instructions
Step 1: Prepare the Chicken
Pat the chicken pieces dry with paper towels. If the pieces are very large, make a few shallow cuts near the thickest parts to help the marinade penetrate.
Keep raw chicken separate from other ingredients and wash your hands and utensils after handling it.
Step 2: Make the Buttermilk Marinade
In a large bowl, whisk together the buttermilk, optional egg, salt, black pepper, and garlic powder.
Add the chicken and turn each piece until well coated. Cover the bowl and refrigerate for at least four hours, or overnight for deeper flavor.
If you do not have buttermilk, combine regular milk with a little lemon juice or vinegar and let it stand for about five minutes before using.
Step 3: Mix the Secret-Style Seasoned Flour
In a wide bowl, combine the flour, cornstarch, paprika, garlic powder, onion powder, oregano, thyme, black pepper, white pepper, cayenne, salt, and optional baking powder.
Mix thoroughly so the spices are evenly distributed.
The key to a crunchy coating: Cornstarch helps create a crispier crust, while the seasoning blend adds savory flavor throughout the breading.
Step 4: Create Those Crunchy Flakes
Remove one piece of chicken from the marinade and allow the excess liquid to drip off.
Place it in the seasoned flour and press the flour firmly onto every surface. Turn the piece several times to ensure it is completely covered.
For extra-crispy chicken, drizzle one or two tablespoons of the buttermilk marinade into the flour mixture and rub it lightly with your fingertips to form small clumps. These clumps create the crunchy flakes associated with restaurant-style fried chicken.
For an even thicker crust, dip the floured chicken briefly back into the marinade, then coat it in the flour mixture again.
Place the coated chicken on a wire rack and let it rest for 10–15 minutes while you prepare the oil. Do not leave raw chicken at room temperature for an extended period.
Step 5: Heat the Oil
Pour enough oil into a heavy-bottomed pot or deep fryer to cover the chicken partially or fully, depending on your equipment. Leave plenty of room at the top to prevent bubbling oil from overflowing.
Heat the oil to approximately 325–350°F (163–177°C). A kitchen thermometer is strongly recommended.
If the oil is too cool, the coating can absorb excess oil and become greasy. If it is too hot, the outside may brown before the chicken cooks through.
Step 6: Fry the Chicken in Batches
Carefully lower a few pieces of chicken into the hot oil using tongs. Avoid overcrowding the pot, as adding too much chicken at once lowers the oil temperature.
Fry smaller pieces for approximately 12–18 minutes and larger bone-in pieces for about 15–25 minutes or longer, depending on their size and the oil temperature. Turn the pieces occasionally for even browning.
These times are estimates only. Always check the internal temperature with a food thermometer. Chicken must reach 165°F (74°C) in the thickest part, avoiding contact with the bone. Some bone-in pieces may need additional cooking time.
If the coating becomes dark before the chicken reach